Inspiration
Be inspired by learning about new ways in which you can support and drive your business forward by keeping up to date with the latest news and blogs from William Smith.
Wrapping sharp corners can be a challenging task that requires attention to detail and precision. The unique shape and angles of sharp corners present difficulties in achieving a seamless and professional finish. Properly conforming the vinyl to the corners while maintaining its integrity can be tricky, as it requires careful stretching, shrinking, and trimming techniques. Additionally, heat management is crucial to prevent overstretching or distortion of the vinyl. However, with the right wrap film, techniques, and attention to detail, it’s possible to overcome these challenges and achieve stunning results.
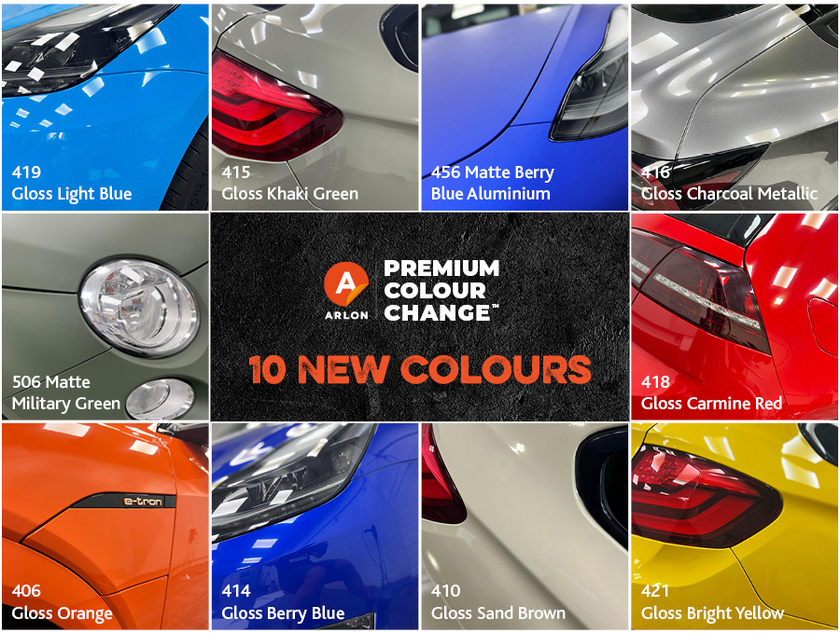
With the recent launch of ten new colours to the Arlon PCC range and our exclusive July promo, there’s never been a better time to get to grips with the capabilities of these films. Today we’re going to look at the recommended approach to wrapping sharp corners using Arlon Premium Colour Change.
Step 1: Preparing the Surface
Clean the surface thoroughly using a recommended cleaning solution. Wipe the surface clean with a microfiber cloth and let it dry completely before proceeding.
Step 2: Measuring and Cutting the Vinyl
Measure the length and width of the area you want to wrap. Add enough excess to each measurement to account for any mistakes or adjustments. Use a measuring tape and mark the back of the vinyl wrap with a pen. Cut the vinyl along the marked lines using a precision cutter or knife. Be sure to cut with a straight and steady hand to get clean edges.
Step 3: Applying the Vinyl
Peel off a small portion of the backing paper from the vinyl wrap, exposing the adhesive side. Align the exposed edge of the vinyl with the starting point on the surface. Press the vinyl firmly against the surface, starting from the centre and working your way out. Use a squeegee to remove any air bubbles and ensure a smooth application. Continue peeling off the backing paper and applying the vinyl in small sections, working your way around the sharp corner.
Step 4: Pre-Stretching the Vinyl
When you approach the sharp corner, you may need to stretch the vinyl slightly to conform to the shape. Use a heat gun to warm the vinyl. Apply heat evenly to the vinyl, focusing on the area that needs to be stretched. Gently pull and stretch the vinyl to fit the corner, being careful not to overstretch and cause distortion or damage to the vinyl. Allow the stretched section to cool before moving on to the next step.
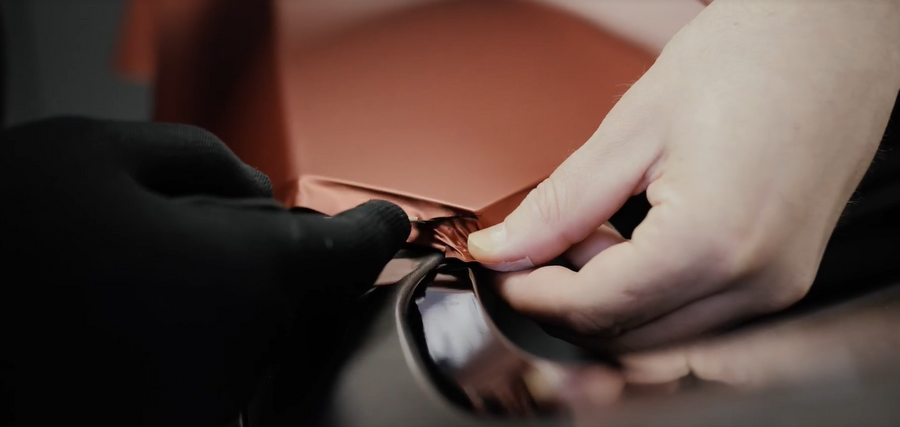
Step 5: Shrinking the Sides
Once the vinyl has cooled, hold the bottom of the corner firmly with the blunt edge of your knife or your thumb. Use the heat gun to shrink the sides of the vinyl around the corner. Apply heat evenly to the vinyl while using your other hand to mould the vinyl around the corner. Work gradually and be careful not to overheat the vinyl, distort the design, or burn yourself when applying heat.
Step 6: Trimming the Excess Vinyl
Once the vinyl is properly wrapped around the corner, use a precision cutter or knife to trim off the excess vinyl. Hold the blade at a slight angle and make a clean, precise cut along the edge of the corner. Take your time and be careful not to cut into the surface beneath the vinyl.
Step 7: Finishing and Post-Heating
After trimming the excess vinyl, go over the wrapped area with a squeegee to ensure it has properly adhered and is free from air bubbles or wrinkles. Use the heat gun to post-heat the wrapped corner. Apply heat evenly to the vinyl to help it set and conform to the shape of the corner.
That’s it! By following these steps, you should be able to wrap sharp corners using Arlon Premium Colour Change effectively. Remember to practice caution and take your time to achieve the best results.
If you found this guide useful, you might be interested in our vehicle wrap training courses here at our Academy. Contact our Training Coordinator today at sam@williamsmith.co.uk to find out about our latest pricing and upcoming course dates.